
Part 3- Building AD Lab (Victim Domain)
Part 3- Building AD Lab (Victim Domain)
Download Windows Server 2019 Eval version. Once the iso file is downloaded. Choose the default at each step of the wizard. Do not worry about entering a product key.

Keep the default storage as well.

In customize hardware, we can remove what we do not need (printer and soundcard) and set the network adapter to VMnet3 since it will be connecting to the pfSense firewall on interface 2 (em2) which is also on VMnet3. The subnet is 192.168.2.0/24.

At this point, we do not want the machine to power on after setup. Once the VM is created we go in to settings again and remove floppy device since it can mess with the setup.
We can now power on the machine and press any key at the prompt. We then click install and choose the OS install below.

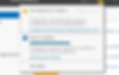
Click custom install then click new then apply. After that click next.

After install, we will be prompted to enter credentials. Do that and continue to follow through with the wizard.

When met with lock screen and prompted to press ctrl + alt+ del use the circled button on the ribbon below or ctrl + alt + insert.

Once logged in, to get a better user experience click VM in the above ribbon and click install VMware tools and then proceed to install it on the server. Choose "Complete" install.
Next we will rename the Windows Server 2019 instance to reflect what it is -our domain controller for the victim network. Go in settings and navigate to about and click rename your pc.

Now we can begin to provision the services for our DC. In server manager, click Manage at the top right and click add role and features.

Click Next>Next>Next> Then in server roles Select AD DS>


Click Next > Next> and then install.

Once the installation is completed, we will receive a notification to promote the server to a domain controller.

Click the link to follow through with the wizard. Simply follow the screenshots below.
Create a domain name for your forest.

Set the password and click next

Just click next when the button is clickable.

Then click next then install and restart after completion. Boom.

We will now continue configurations.
We will click on Manage in Server Manager again then Add Roles and Features.
Click Next>Next>Active Directory Certificate Services

Click Next>Next>Next>Tick restart the destination server automatically > then install

We'll then close it. We should have a new notification prompting us to now configure AD CS on the server.
Click change and then enter your credentials

For the role services we will click certification authority

We will continue to accept defaults until we get to Validity Period. Set the period for any lengthy time.

Click Next until you reach confirmation tab and click configure

We can restart now.
Adding users
Search active directory users and computers and add user by right clicking users >new>user then fill out the form that pops up.

Click next and keep the password for the user super simple. We will have fun taking advantage of the misconfigurations through various attacks later on. Password for users is werty123!

Lastly, we want to disable the firewall. Search windows defender firewall and then on the lift click ' Turn windows defender firewall on or off'

I heavily suggest getting the DNS server setup by following this tutorial.
For the DNS forwarders in the above video I heavily suggest setting your router as your DNS forwarder.
Next we need to get a connection going. Go to control panel>network and internet> on the left side click change adapter settings> right-click adapter> properties>double click ipv4>
Enter these configurations below as they match out topology.

Now something to note:
Many persons who setup Windows Server 2019 experience an issue where they have internet access, but the Network Connectivity Status Indicator(NCSI) shows the warning icon which mean no internet access. One common reason for this is that the Network Awareness Service is starting before the DNS service. To fix this we need to create a dependency to allow the Network Awareness Service to start only after DNS has started.

First run sc qc nlasvc in an elevated command prompt. This will list all current dependencies.
Then we will run sc qc nlasvc DEPEND = All the listed service in the dependencies plus DNS. So for example it could look like this:
sc config nlasvc depend= NSI/RpcSs/TcpIp/Dhcp/Eventlog/DNSFor more on this check this Microsoft community article.
You may also encounter an issue where you are being denied permissions to perform admin related tasks if so. Feel free to check out this forum.
We next log on to pfsense machine from Kali
Navigate to Services > DHCP Server> Victim Domain
Add the DC under DNS Servers

Then we will add the domain name here as well

At this point, I decided to expand the environment to create a hybrid one by enable ad connect. But we will revisit this in the next part.
For now, we will create a Windows 10 VM. Google the eval version and download the iso file.
We will install it with defaults. Only customization being placing it in vmnet3 so it's on the same network as the DC. Ensure 'Power on this virtual machine after creation' is not ticked. We will then go back in and delete the floppy in custom hardware.

Accept the license terms and configure windows 10 as usual. When you get to this point select 'I don’t have internet.'

Then continue with limited setup.
Once we are at the home screen install vmware tools and then run it and install.

Next, we want to change the PC name. a quick way to do this is press the WIN+R then type sysdm.cpl > click change and then change the name. Restart

Then now we will configure the network. The configuration should look very similar to the DC besides the DNS being the DC itself. This machine will be static.

Next, we will join to the PC to the domain by clicking domain below and entering the domain name. Then press enter. It will prompt for domain level credentials to approve it. Any domain admin creds can work.


If we go to the DC >computers and we will see that the machine was successfully added. We can take a baseline snapshot.
You can use the same Iso to spin up another Windows 10 VM to join to the domain. Maybe give it a 192.168.2.30 IP.